この記事はCAMPHOR- Advent Calendar 2018 11日目の記事です。
このたびブログを新調しました。Nuxt + TypeScriptで作成したSingle Page ApplicationをGAEにホストして、Server Side Renderingも行っています。
ブログ移行の経緯や実装時のあれやこれやはまた明日別の記事でお話ししますが、その前段として本日はNuxt + TypeScriptのアプリケーションを作る時に自分がやったことを備忘録的に記録したいと思います。
また本記事で紹介しているソースコードはGitHubに公開しています↓↓
Embedded content: https://github.com/andoshin11/nuxt-typescript-example
TypeScriptとは
TypeScriptとはMicrosoftの主導で開発されているAlt-JSの一種です。
コンパイラによる型検査だけでなく、Generics・Conditional Types・Mapped Types等を利用した豊かな型表現力、強力な型推論、エディタでの型補完などを備えており、スケーラブルなアプリケーション開発をサポートするツールとして注目を集めています。
TypeScriptの詳細な解説や使い方についてはネット上に豊富に情報が落ちているため今回は割愛させてください。
Embedded content: https://www.typescriptlang.org/
TypeScriptを利用するには様々な方法があります。
一番シンプルな方法はCLI上で tscコマンドを利用して直接コンパイルする方法ですが、すでに中規模以上のアプリケーションを運用している際はWebpack等のバンドラに新たなビルドフックを組み込んであげる必要があるでしょう。
Nuxtも例外ではなく、TSを利用するにはwebpackをラップしているNuxtのBuilderに変更を加えてあげなければいけません。
アンチパターン
まず良く目にするアンチパターンですが、
$ vue init nuxt-community/typescript-template my-project上記のコマンドでボイラープレートを使う方法はDeprecatedです。やめましょう。
Nuxt公式のtypescript-templateはもうメンテが止まっており、レポジトリ内の型定義やtsconfigの設定も不十分です。
抵抗がある方も多いかとは思いますが、素直にWebpackを拡張していきましょう。
TypeScriptのインストール

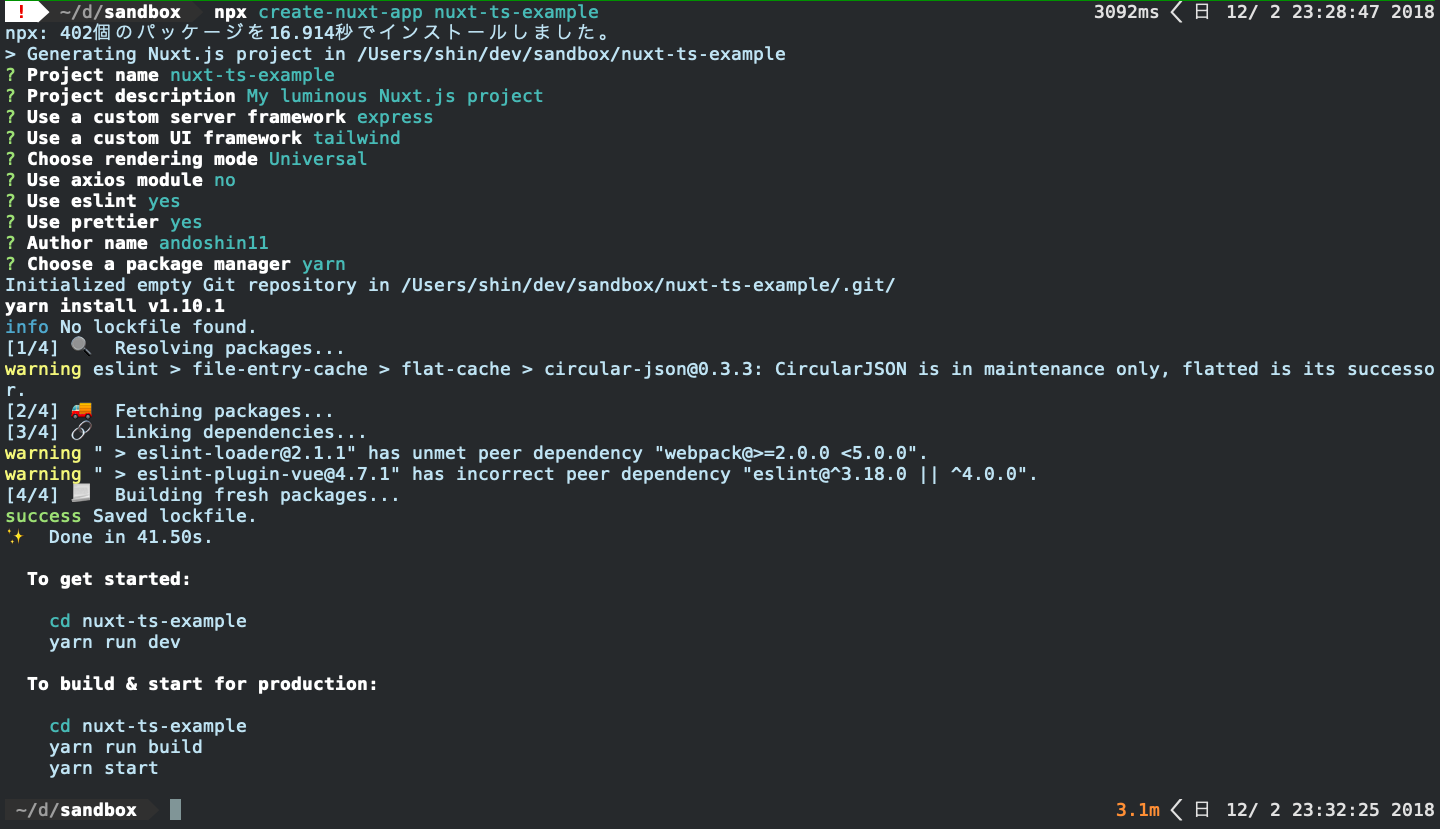
create-nuxt-appでNuxtプロジェクトを作成したら、TSを動作させるために必要なパッケージをインストールします。
インストールするのは、
の3つです。@types/nodeはNode特有の機能(process.env, global等)の型定義を提供してくれるもので、後ほど重宝するかと思います。
$ yarn add -D typescript @types/node ts-loaderCompilerの設定
上述のパケージのインストールが完了したらTypeScript Compilerの設定ファイルを用意します。
プロジェクトルートに tsconfig.jsonを作成し、以下の内容を記述してください。
{
  "compilerOptions": {
    "sourceMap": true,
    "target": "es5",
    "strict": true,
    "module": "esnext",
    "moduleResolution": "node",
    "esModuleInterop": true,
    "noImplicitThis": true,
    "allowJs": true,
    "baseUrl": ".",
    "lib": ["esnext", "dom"],
    "paths": {
      "@/*": ["src/*"]
    }
  }
}
僕はNuxtプロジェクトを作成したら真っ先に srcDir: 'src/'を設定してアプリケーションディレクトリを src/以下に移動しているのでこのような設定になっていますが、お好みでpathsの設定は変更してください。
フォルダ構造はこんな感じです。
.
├── README.md
├── nuxt.config.js
├── package.json
├── postcss.config.js
├── src
│   ├── assets
│   │   └── README.md
│   ├── components
│   │   ├── Logo.vue
│   │   └── README.md
│   ├── layouts
│   │   ├── README.md
│   │   └── default.vue
│   ├── middleware
│   │   └── README.md
│   ├── pages
│   │   ├── README.md
│   │   └── index.vue
│   ├── plugins
│   │   └── README.md
│   ├── server
│   │   └── index.js
│   ├── static
│   │   ├── README.md
│   │   └── favicon.ico
│   └── store
│       └── README.md
├── test
├── tsconfig.json
└── yarn.lock

12 directories, 21 files
Webpackにts-loaderを設定する
Embedded content: https://nuxtjs.org/api/configuration-build#extend
NuxtのBuild APIのドキュメントを読むと、 extendオプションでwebpackの設定を拡張できることが分かります。Webpackのconfigオブジェクトを引数にとって、そちらを拡張していくような関数を書いてあげましょう。
ちなみにより一般的なのはNuxt modulesとしてts-loaderを組み込む方法ですが、シンプルにWebpackのconfigオブジェクトを拡張して行くほうが僕は好きです。
// webpack.config.extend.js
const path = require('path')

module.exports = config => {
  config.resolve.extensions.push('.ts', '.js', '.vue', '.css', '.html')

  const tsLoader = {
    loader: 'ts-loader',
    options: {
      appendTsSuffixTo: [/\.vue$/],
      context: __dirname,
      configFile: 'tsconfig.json'
    }
  }

  // Add TypeScript loader
  config.module.rules.push(
    Object.assign(
      {
        test: /((client|server)\.js)|(\.tsx?)$/,
        exclude: /node_modules/
      },
      tsLoader
    )
  )

  // Add TypeScript loader for Vue SFC compile process
  for (let rule of config.module.rules) {
    if (rule.loader === 'vue-loader') {
      rule.options.loaders = {
        ...rule.options.loaders,
        ts: tsLoader
      }
    }
  }

  // Add alias
  config.resolve.alias['@'] = path.resolve(__dirname, 'src')

  return config
}- TSファイルを
ts-loaderで処理する設定 - Vue SFCをvue-loaderで処理する際に
ts-loaderでも処理する設定
の主に2つを記述しました。
用意ができたらこの設定ファイルをNuxtに食わせます
// nuxt.config.js
const extendConfig = require('./webpack.config.extend')
...
  /*
  ** Build configuration
  */
  build: {
    extend(config) {
      extendConfig(config)
    }
  }
...eslint-loaderは邪魔なので消しちゃいました。 extend関数は第二引数にContextを取れるので、Client Onlyで行いたい処理やDev Env Onlyでやりたい処理がある方は適宜ハンドリングしてあげてください。
Extensionsの設定
TSで .vueファイルを解釈するにはshimsと呼ばれる定義ファイルが必要です。
// srt/types/shims-vue.d.ts
declare module '*.vue' {
  import Vue from 'vue'

  const _default: Vue
  export default _default
}
NuxtがTSを認識することもデフォルトではできないので、そちらにもExtensionsの設定を記述します
// nuxt.config.js
...
  /*
  ** Extensions
  */
  extensions: ['ts', 'js'],
 ...
これでPluginsやStoreをTSで記述しても上手くNuxtが認識してくれるはず。
それではアプリケーションを立ち上げて見ましょう。
$ yarn dev
起動成功です👏
TypeScriptを体験する
TypeScriptを体験するサンプルとして、簡単な Calculator.vueファイルを作成してみました。
<template>
  <div class="Calculator">
    <input type="number" class="left" v-model="left">
    <select name="operator" v-model="operator">
      <option :value="Operators.ADD">+</option>
      <option :value="Operators.SUBTRACT">-</option>
      <option :value="Operators.MULTIPLE">*</option>
      <option :value="Operators.DEVIDE">/</option>
    </select>
    <input type="number" class="right" v-model="right">
    <div class="answer">= {{ answer }}</div>
  </div>
</template>

<script lang="ts">
import Vue from 'vue'

enum Operators {
  ADD,
  SUBTRACT,
  MULTIPLE,
  DEVIDE
}

interface IData {
  Operators: typeof Operators
  left: string | null
  right: string | null
  operator: Operators
}

export default Vue.extend({
  data(): IData {
    return {
      Operators,
      left: null,
      right: null,
      operator: Operators.ADD
    }
  },
  computed: {
    answer(): number {
      if (!this.left || !this.right) return 0

      const left = Number(this.left)
      const right = Number(this.right)

      switch (this.operator) {
        case Operators.ADD:
          return left + right
        case Operators.SUBTRACT:
          return left - right
        case Operators.MULTIPLE:
          return left * right
        case Operators.DEVIDE:
          return left / right
        default:
          return 0
      }
    }
  }
})
</script>

<style scoped>
.Calculator {
  display: flex;
  justify-content: center;
  margin-top: 16px;
}

input {
  border: solid 1px #ddd;
  margin: 0 8px;
}
</style>
簡単な四則計算を行うComponentです。

enumの定義、interfaceの定義、型アノテーションの記述などを利用できていることが確認できます。

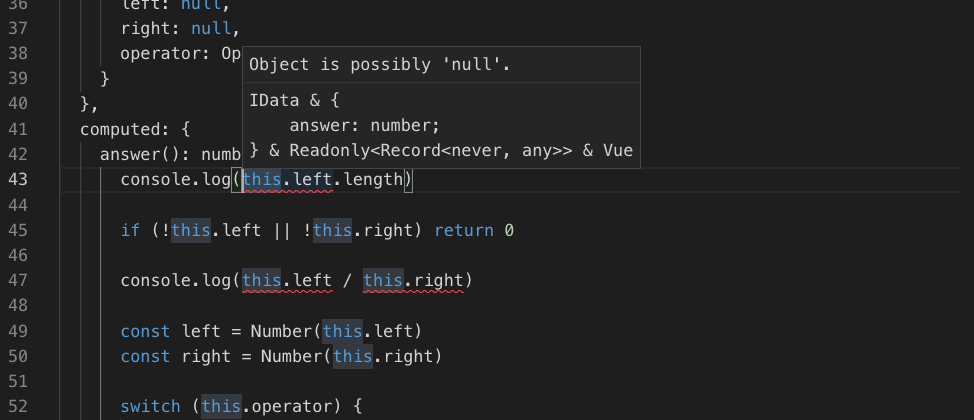
Nullableな値にAssertionを挟まずprototype methodを叩こうとすると怒られますし、StringをそのままIncompatibleなOperatorに渡そうとするとこちらもエラーを吐いてくれます。

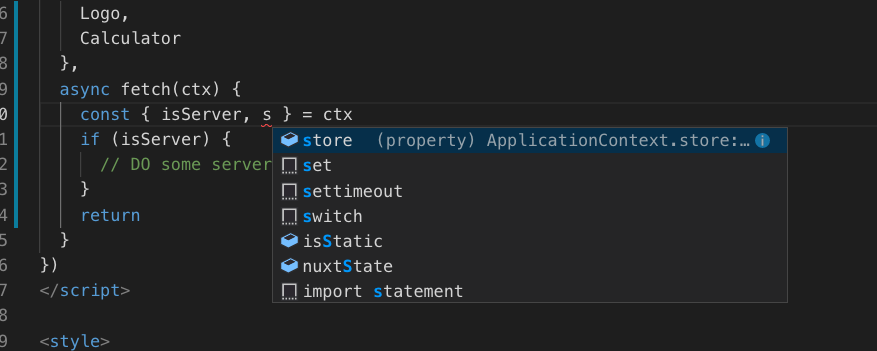
型の補完もバッチリ✌️
Nuxt APIを定義する
Nuxtは asyncDataや fetchなどの便利なAPIを提供してくれますが、これらの機能を型安全に利用するためには自分でVueのinterfaceを拡張してあげる必要があります(公式で対応してくれー泣)
これについてはNuxtの生みの親であるSebastianとも話をしましたが、 nuxt.config.jsにリテラルでModule名を記述するだけでContextにAPIが生える世界観はもうしばらく続きそうなので、本当の意味での型安全なエコシステムをNuxtに求めるにはまだ時期尚早でしょう。
types/nuxt.d.tsを作成し、ゴリゴリとNuxtのContextやAPIの型を定義
// nuxt.d.ts
import Vue from 'vue'
import { Store, ActionTree, ActionContext } from 'vuex'
import VueRouter, { Route } from 'vue-router'
import { RootState } from '@/store'
import { RequestOptions, ServerResponse } from 'http'

type Dictionary<T> = { [key: string]: T }

export interface ApplicationContext {
  app: Vue
  isClient: boolean
  isServer: boolean
  isStatic: boolean
  isDev: Boolean
  isHMR: Boolean
  route: Route
  store: Store<RootState>
  env: Dictionary<any>
  params?: Route['params']
  query: Route['query']
  req: RequestOptions
  res: ServerResponse
  redirect: (path: string, query?: Route['query']) => void
  error: (params: { statusCode: number; message: string }) => void
  nuxtState: RootState
  beforeNuxtRender: (
    fn: (
      params: {
        Components: VueRouter['getMatchedComponents']
        nuxtState: RootState
      }
    ) => void
  ) => void
}

declare module 'vuex/types/index' {
  interface ActionTree<S, R> {
    nuxtServerInit: (
      context: ActionContext<S, R>,
      nuxtContext: ApplicationContext
    ) => void
  }
}

declare module 'vue/types/options' {
  interface Transition {
    name?: string
    mode?: 'in-out' | 'out-in'
    type?: 'transition' | 'animation'
    css?: boolean
    duration?: number
    enterClass?: string
    enterToClass?: string
    enterActiveClass?: string
    leaveClass?: string
    leaveToClass?: string
    leaveActiveClass?: string
    beforeEnter?(el: HTMLElement): void
    enter?(el: HTMLElement, done: Function): void
    afterEnter?(el: HTMLElement): void
    enterCancelled?(el: HTMLElement): void
    beforeLeave?(el: HTMLElement): void
    leave?(el: HTMLElement, done: Function): void
    afterLeave?(el: HTMLElement): void
    leaveCancelled?(el: HTMLElement): void
  }

  interface ComponentOptions<V extends Vue> {
    head?: any
    watchQuery?: string[]
    layout?: string | ((context: ApplicationContext) => string)
    fetch?: (context: ApplicationContext) => Promise<void>
    asyncData?: (context: ApplicationContext) => Promise<any> | undefined
    transition?: string | Transition | ((to: any, from: any) => string)
    scrollToTop?: boolean
    validate?: (context: ApplicationContext) => Promise<boolean> | boolean
    middleware?: string | string[]
  }
}Contextの型は公式のドキュメントを参考に。
ディスクレイマーとして、自分が普段利用するAPIの型以外はメンテしていないので適宜修正して利用することをオススメします。
これを定義することでVue SFCの中でNuxtのContext型を参照できるようになりました。

Lintの設定
NuxtにはデフォルトでプレーンJSを対象としたES Lintの設定が組み込まれていますが、 TSで記述されたミドルウェアやコンポーネントのLintをこのままでは実行できません。
まずは下記のパッケージをインストールします。
$ yarn add -D eslint-config-typescript eslint-plugin-typescript typescript-eslint-parserインストールが完了したら、JS向け・TS向け・Vue向けのそれぞれのES Lintの設定ファイルを用意します。
// .eslintrc.js
module.exports = {
  env: {
    node: true,
    commonjs: true,
    es6: true
  },
  extends: ['eslint:recommended'],
  parserOptions: {
    ecmaVersion: 2017,
    sourceType: 'module'
  },
  plugins: [],
  rules: {
    indent: ['error', 2],
    'linebreak-style': ['error', 'unix'],
    quotes: ['warn', 'single'],
    semi: ['error', 'never']
  }
}
// .eslintrc.ts.js
const baseConfig = require('./.eslintrc.js')
const overrideConfig = {
...baseConfig,
extends: [...baseConfig.extends, 'eslint:recommended', 'typescript'],
parserOptions: {
...baseConfig.parserOptions,
parser: 'typescript-eslint-parser'
},
plugins: [...baseConfig.plugins, 'typescript'],
rules: {
...baseConfig.rules,
'no-undef': 'off',
'typescript/interface-name-prefix': 'warn',
'typescript/explicit-member-accessibility': 'off',
'typescript/member-ordering': 'off',
'typescript/no-parameter-properties': 'off',
'typescript/member-delimiter-style': 'off',
'typescript/interface-name-prefix': 'off'
}
}
module.exports = overrideConfig// .eslintrc.vue.js
const baseConfig = require('./.eslintrc.ts.js')
const overrideConfig = {
...baseConfig,
extends: [...baseConfig.extends, 'plugin:vue/recommended'],
parserOptions: {
...baseConfig.parserOptions,
parser: 'typescript-eslint-parser'
},
rules: {
...baseConfig.rules,
indent: 0
}
}
module.exports = overrideConfigファイルを分けて管理するのは少々面倒ですが、スコープを区切る意味で有効なのでこの手法をとっています。
NPM Scriptの設定はこんな具合に
// package.json
...

    "lint": "npm-run-all lint:*",
    "lintfix": "npm-run-all lintfix:*",
    "lint:js": "eslint --ext .js .",
    "lintfix:js": "yarn run lint:js --fix",
    "lint:ts": "eslint -c .eslintrc.ts.js --ext .ts .",
    "lintfix:ts": "yarn run lint:ts --fix",
    "lint:vue": "eslint -c .eslintrc.vue.js --ext .vue .",
    "lintfix:vue": "yarn run lint:vue --fix",
...
プロダクションではここに加えてStyle Lintも設定しています。
とりあえずこのくらい設定しておけば大丈夫でしょう。
最後に
今回は書き切れませんでしたが他にもJestの設定やCIの設定等やることは山積みです。ただここから先は一般的なTSプロジェクトとやる事も変わらないので、適宜ググってみてください。
nuxt.d.tsの型定義がまだまだ不十分なので、今後改善していきたいです。
明日はkm_connerの記事です。自分も本記事の続編としてNuxtのパフォーマンスチューニングに関する記事を公開予定なので、そちらもお楽しみに!
