
ネタです。
先日こんな記事がバズっていました。
Embedded content: https://qiita.com/issei_y/items/ab641746be2704db98be
この記事を読んでGitHubでSNSのプロフィールを差分管理して、それをもとにサーバーレスプログラムで情報を更新できたら面白いなーと思ったのが今回のモチベーションです。
仕組みとしてはこんな感じ。

CircleCIでmasterブランチの変更を検知したらBotを起動し、API経由でSNSのプロフィール情報を更新します。
GCP大好きマンなのでTypeScript on Firebase Cloud Functionsなプログラムです。
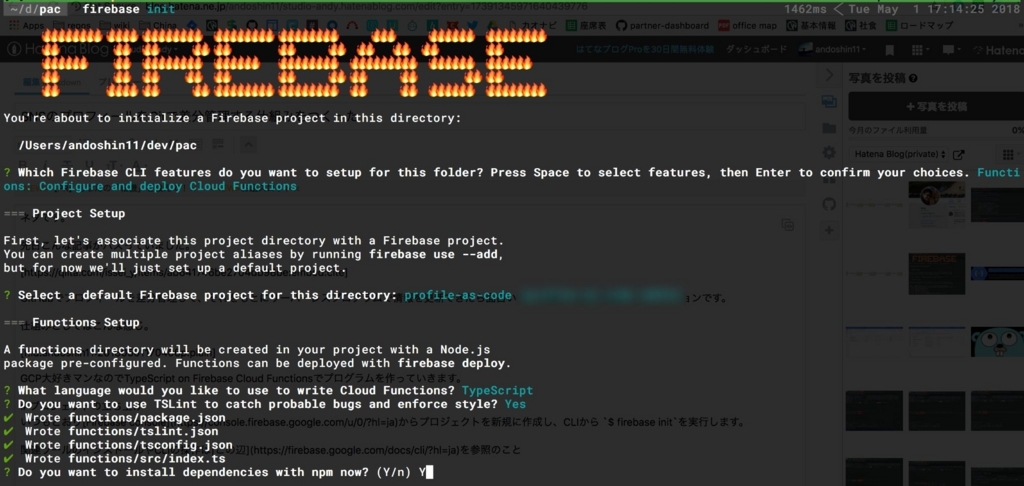
プロジェクトの立ち上げ
いつもどおりFirebase consoleからプロジェクトを新規に作成し、CLIから $ firebase initを実行します。
関連ツールのインストールやCLIの操作はこの辺を参照のこと。
Master fileの取得
今回はGitHub上にあらかじめ別のプロジェクトを作成し、そちらに profile.jsonというSNSのプロフィールを管理するMaster fileを用意しました。
Embedded content: https://github.com/andoshin11/social-profile
JSONの中身はこんな感じ
// profile.json
{
  "twitter": "Vue lead at merpay, Inc."
}
このファイルをCloud Functions上で取得・パースするプログラムを実装していきます。 functions/src/index.tsに以下の内容を記述。
// index.ts
import * as functions from 'firebase-functions';
import fetch from 'node-fetch';

// 自分のmaster fileのurlを入れる
const SOURCE = "https://github.com/andoshin11/social-profile/raw/master/profile.json";

enum Service {
    TWITTER = "twitter",
}

interface Profile {
    [Service.TWITTER]: string;
}

/**
 * getProfile function
 *
 * @return {Profile} Profile master data
**/
const getProfile = async (): Promise<Profile> => {
    const res = await fetch(SOURCE);
    const json = await res.json();
    return json;
}

export const testFunc = functions.https.onRequest(async (req, res) => {
  try {
    const profile = await getProfile();
    res.send(profile[Service.TWITTER]);
  } catch(e) {
    console.log(e)
  }
});
$ firebase deployコマンドでデプロイしたら表示されるURLを叩いてレスポンスを確認します。
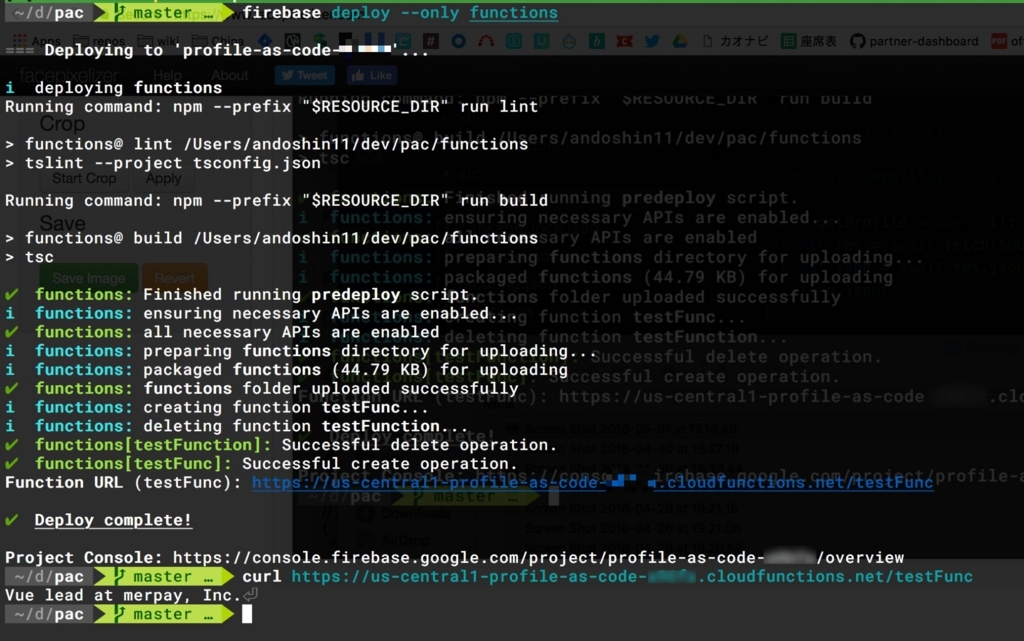
Cloud FunctionsからGitHubで管理するデータを参照できるようになりました👏👏
Twitterのプロフィールを更新する
Cloud FunctionからTwitter APIを叩いてプロフィールを更新してみます。
APIを直接叩く実装はなかなか大変なので以下のnodeパッケージを利用
Embedded content: https://www.npmjs.com/package/twitter
新たに functions/src/twitter.tsを作成し、以下の内容を記述します。
// twitter.ts
import * as functions from 'firebase-functions'
import * as Twitter from 'twitter'

export default class TwitterClient {
  private client

  constructor() {
    this.client = new Twitter({
      consumer_key: functions.config().twitter.consumer_key,
      consumer_secret: functions.config().twitter.consumer_secret,
      access_token_key: functions.config().twitter.access_token_key,
      access_token_secret: functions.config().twitter.access_token_secret
    })
  }

  /**
   * updateProfile function
   * updates twitter profile
  **/
  updateProfile(description: string): Promise<void> {
      return this.client.post('account/update_profile', {
          description
      })
  }
}
Twitter APIの利用に必要なAPI KeyとSecretは事前にこちらから取得し、Firebaseの環境変数に設定しておいてください。
index.tsでmaster fileを取得後に以下の処理を追加
// index.ts
...
export const testFunc = functions.https.onRequest(async (req, res) => {
  try {
    const profile = await getProfile();
    const client = new TwitterClient()

    await client.updateProfile(profile[Service.TWITTER])
    res.send('success');
  } catch(e) {
    console.log(e)
  }
});
再度関数をデプロイし、 curlでエンドポイントを叩いて起動します。
こちらが関数実行前のプロフィール

そしてこちらが関数実行後のプロフィール

GitHubのデータがTwitterに反映されたのが確認できました!
IAMでセキュリティ強化
デフォルトの状態では誰でもCloud Functionsを起動できてしまいセキュリティ上よろしくないので、認証フローを追加していきます。
Embedded content: http://studio-andy.hatenablog.com/entry/cloud-functions-iam
手前味噌ながら先日書いた上の記事を参考にIAMを利用した認証の仕組みを実装。 index.tsは全体的に書き直しました。
// index.ts
import * as functions from 'firebase-functions';
import fetch from 'node-fetch';
import * as Google from 'googleapis-async';
import TwitterClient from './twitter';

const SOURCE = "https://github.com/andoshin11/social-profile/raw/master/profile.json";

enum Service {
    TWITTER = "twitter",
}

interface Profile {
    [Service.TWITTER]: string;
}

/**
 * getProfile function
 *
 * @return {Profile} Profile master data
**/
const getProfile = async (): Promise<Profile> => {
    const res = await fetch(SOURCE);
    const json = await res.json();
    return json;
}

/**
 * getAccessToken function
 *
 * @param {Object} req Cloud Function request context
**/
const getAccessToken = (req) => {
  const header = req.get('Authorization')
  if (header) {
      const match = header.match(/^Bearer\s+([^\s]+)$/);
      if (match) {
          return match[1];
      }
  }
  return null;
}

/**
 * isValidUser function
 *
 * @param {Object} req Cloud Function request context.
 * @param {Object} res Cloud Function response context.
 * @return {boolean} whether the user is valid
 */
const isValidUser = async (req, res): Promise<boolean> => {
  const accessToken = getAccessToken(req);

  if (!accessToken) return false;

  const auth = new Google.auth.OAuth2();

  // Set credential
  auth.setCredentials({ access_token: accessToken });

  const bucket = functions.config().bucket.pac;
  const permission = 'storage.buckets.get';
  const options = {
    bucket,
    permissions: [permission],
    auth
  }

  try {
    const response = await Google.storage('v1').buckets.testIamPermissions(options)
    if (response && response['permissions'] && response['permissions'].includes(permission)) {
      return true;
    } else {
      return false;
    }
  } catch (e) {
    throw new Error(e)
  }
}

export const updateProfile = functions.https.onRequest(async (req, res) => {
  try {
    const isValid = await isValidUser(req, res)
    if (isValid) {
      const profile = await getProfile();
      const client = new TwitterClient();

      await client.updateProfile(profile[Service.TWITTER]);
      res.send('success');
    } else {
      res.status(403).send("The req is forbidden.");
    }
  } catch(e) {
    console.log(e)
  }
});
超絶コードが汚いのはご容赦ください。Cloud Bucketの名前を環境変数に設定するのをお忘れなく。
この状態で普通にcurlでエンドポイントを叩くとちゃんと認証エラーで怒られるはずです。

Circle CIの設定
master fileを更新するたびに手動でCloud Functionを起動するのは面倒なので、Circle CIに仕事を任せます。
Circle CIの設定を記述するのは前述のmaster fileを管理しているレポジトリの方です。
Embedded content: https://github.com/andoshin11/social-profile
こちらののmasterブランチに変更がpushされたらCloud Functionsのエンドポイントをaccess token付きで叩けるよう、 .circleci/config.ymlに記述します。
version: 2
jobs:
  build:
    docker:
      - image: google/cloud-sdk
    working_directory: ~/repo
    steps:
      - checkout
      - run:
          name: Decode Client Secret
          command: echo "$CLIENT_SECRET" | base64 -i --decode > ./client-secret.json
      - run:
          name: Invoke Cloud Functions
          command: curl $FUNCTION_URL -H "Authorization:Bearer $(GOOGLE_APPLICATION_CREDENTIALS=./client-secret.json gcloud auth application-default print-access-token)"
    branches:
      only:
- masterあらかじめ記事を参考にGCPの認証情報を持ったJSONを base64でエンコードしてCircle CIの環境変数( $CLIENT_SECRET)に設定しておいてください。Cloud Functionsのエンドポイントも環境変数で管理しています。
設定が完了したらmasterブランチに変更を加えて差分をpush。
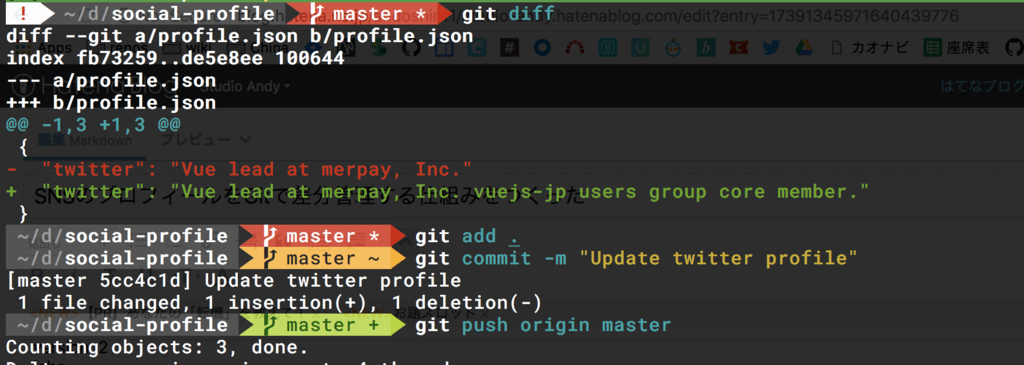

ビルドに成功👏👏

Twitterのプロフィールが自動で更新されました!!
TODO
今後やりたいことは以下の通り
- コードを綺麗にする(一番大事)
- Facebook・GitHubにも対応する
- cronでSNSを監視し、masterと差分があればpull request作成
まぁ気が向いたらやります。レポジトリはこちらです。
Embedded content: https://github.com/andoshin11/profile-as-code
まとめ
Cloud Functionsはシュッと書けるのでなれると便利です。デバッグは気合いで頑張る。TypeScript全然分からないので誰か教えてください。